The Saved Game Manager has two "panes". The top one lists all the files in the source directory and the bottom one lists the files in the destination directory. Please note that just because the top pane is named the Source directory, it doesn't mean you can't copy files from the Destination directory into it.
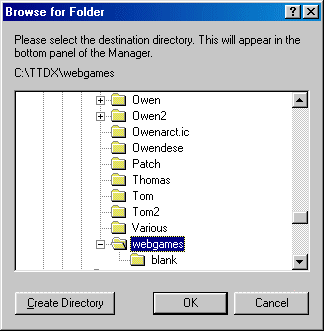
When you start the Manager for the first time, two dialogs will appear that look similar to this will appear:

If you are using Microsoft Windows XP, the dialog will look slightly different.
The first dialog will ask you to select the source directory, which will appear in the top pane. If you want to create a new directory, click Create Directory. A dialog will appear asking you for the folder's name. Do not include a path - the directory will be created inside the current directory displayed in the list. Please note that if you are using Windows XP, a new folder will appear in the directory list, ready for you to type in a name.
NOTE: As of 17/11/2001, the Create Directory button is not present in the browse dialog on platforms other than Windows XP, due to technical problems. (If someone can help me get a button press with a hook using the Win32 API, please e-mail me!)
The second dialog will ask you for the destination directory. This operates in just the same way as the source dialog above.
Changing the directories at a later date
To change the source or destination directory at a later date, simply choose Select Source Directory... or Select Destination Directory... from the File menu. The above dialog will appear.
A note about networks
With Saved Game Manager 2.0 and earlier, you had to map a drive letter to a network drive if you wanted to be able to access it from the Browse dialog. This is no longer required with Saved Game Manager 2.1 or higher, due to the new Browse dialog.